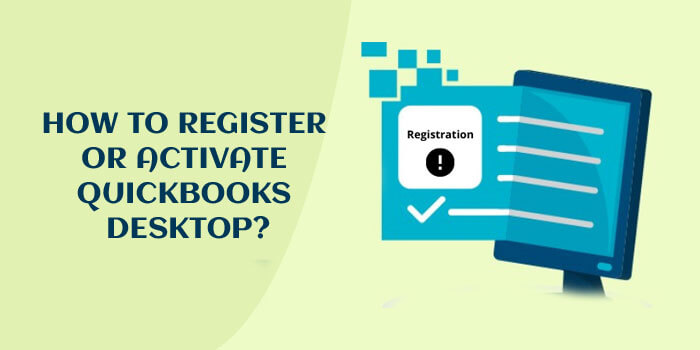
After installing QuickBooks software, one needs to learn how to activate it and how to register QuickBooks Desktop on it. Every time you install QuickBooks, it will prompt you for registration and activation. It asks the user to either activate it by using Intuit account or by activating it manually. A message “Set up your Intuit account” is displayed on the screen when you launch the QuickBooks application.
When you activate QuickBooks desktop, the user needs to log into their Intuit account to share the information and details regarding your account. Using the same Intuit account, you can log in to multiple websites at a time. In this write-up, we will provide you with information regarding how to register QuickBooks desktop.
Registering or activating QuickBooks
• First things first, check whether the QuickBooks software is activated or not. Click the F2 key or press and hold the Ctrl+1 key.
• If you see a message that says QuickBooks Desktop is activated, then that’s it. You don’t need to do anything else. If it’s not activated, in that case, follow the proceeding steps to activate it.
• You might face the error, “the validation code is wrong” at the time of validation. In that case, proceed further to verify the following things.
• Make sure that the validation code is right.
• You should have the correct license number and product number. There are times when the license number does not match the product number. In such a case, make sure to change it before you proceed further to activate QuickBooks Desktop.
Registering QuickBooks Desktop 2016 and later versions
To register the QuickBooks Desktop 2016 or newer versions, follow the below-mentioned steps.
• First, you need to launch QuickBooks and press F2 on the keyboard
• Now, you need to find the registration status on the product information window, which is available on the right-hand side of the license number
• You do not need to do anything if the status shows activated
• Should the status show not activated, you should follow the next steps.
• Choose Ok. It closes the product information window.
• Now, visit the Help menu to register QuickBooks Desktop. For versions before 2016, select the Register QuickBooks option.
• Do as per instructed on the screen. The next step is completing the activation process.
• You shall get a Thank You message after the activation process is complete.
Registering or Activating QuickBooks Desktop on Mac through the below-mentioned steps-:
If you are using QuickBooks Desktop on Mac, you need to follow the steps below to register or activate it.
• Go to menu first and select the option that says Register QuickBooks
• Now enter the user license number or product number
• Then, click Next
• Now, you need to select the Register Online tab
• In the next step, go follow the instructions displayed on the screen. This should complete the registration process.
• If it shows an error that you have not found the register option, then it shows that the QuickBooks software is already registered on Mac.
For Older Versions:
For older versions, you need to re-register the QuickBooks Software application. You can easily register it again by reinstalling the software again or contacting the company if you are not able to do so.
Registering or Starting QuickBooks Desktop with your Intuit Account
There could be two scenarios. The activation screen that shows the instructions to register the application could be either with an existing Intuit account or a new one could be created.
In case the account is not created, enter the required information to create the user ID and proceed with finishing the activation process. You should follow the below-given steps to register QuickBooks Desktop with your Intuit account-:
• The first step, access your Intuit account
• Choose “forgot my user ID or password link.”
• Now enter the registered email, phone number, or user-id in the next step
• You will get an activation code, which you need to enter
• After you are done, view the User Id, and then you need to Reset the Password
• Login again with the changed password to end the process
Facing Errors During Registration or Activation of QuickBooks Desktop?
• Should you find that the information you are entering is not accepted, you will need to ensure that you are supplying the correct information.
• Disable antivirus software(till the process is complete) if you see a black screen or error.
Fixing errors during registration or activation of QuickBooks Desktop
Errors faced during registration or activation of QuickBooks Desktop can be faced by following the below-mentioned solutions-:
Solution 1: Shutting down active background processes on your system
One solution is closing down all active background processes in your Windows system through the following steps-:
1.) Start the Task Manager
2.) You need to select the QuickBooks and other active background processes running on your system
3.) Individually, choose each process and click on the End Task button
4.) Once you are done with background processes, get back on to register QuickBooks Desktop.
Solution 2: Verifying your system’s date and time
Should you be experiencing any discrepancies related to registration or activation of QuickBooks Desktop, you should verify whether the date and time on your system are updated and correct. You need to go to Desktop’s settings and make sure that your operating system’s date and time settings are updated.
Solution 3: Creating a new admin user account
Sometimes user accounts can lead to problems. Therefore, in such cases, it is advisable to create an altogether a new Windows admin user account. Through following steps, you can create a new admin user-:
1.) Go to Settings
2.) Click on “Create a new Windows User” with admin rights
3.) Now, close the Settings below.
4.) Log into your Windows with the new user account that has been established.
5.) Last but not least, try registering or activating the QuickBooks Desktop version.
Solution 4: Resetting the .ecml file
Through the .ecml file, QuickBooks recognizes that the bought product is legitimate and registered. It allows the software to work smoothly. This file could not be working properly or could be corrupt for a number of reasons. To fix this, you need to perform the following actions-:
1.) Open the Run window
2.) Under C:Program DataIntuitEntitlementClientV8directory, type C:ProgramDataIntuitEntitlement Client V8
3.) Press Enter
4.) If it doesn’t work, try C:\Program Data\Intuit\Entitlement Client\V6
5.) Again, RUN and then Enter
6.) A popup will appear; here, look for EntitlementDataStore.ecml file and then click ok
7.) Right-click on the file and then choose the Delete option
8.) Restart QuickBooks and try activating again
Solution 5: Installing Diagnostic Tool to troubleshoot the installation
1.) Right-click on QuickBooks TooL Hub and run it as an administrator
2.) From the drop-down menu, choose the installation issues.
3.) In the next step, choose QuickBooks Install Diagnostic Tool
4.) This tool begins automatically diagnosing the issue
5.) Restart your computer and relaunch the QuickBooks application.
6.) Try to re-register or activate QuickBooks Desktop.
Solution 6: Resolving errors through QuickFix My program
1.) Go to QuickBooks Tool Hub
2.) Now, choose the Program Issues option
3.) Select QuickFix My Program
4.) It scans the issues and resolves them on their own
5.) Restart the system and relaunch the QuickBooks again
Solution 7: Using Clean Install Tool in QuickBooks
Using the Clean Install Tool in QuickBooks can sometimes fix the registration or activation issues in QuickBooks Desktop. The steps that follow can guide you on how to use this tool-:
1.) Make a backup of your data and gather the requisite information
2.) In the next step, clear all the QuickBooks data from the system
3.) Download and Install the QuickBooks Tool Hub
4.) Using Clean Install Tool, finish the installation
5.) Try reinstalling the QuickBooks Desktop
Read Also: What’s New in Quickbooks Desktop 2022
Conclusion
The above-mentioned steps can help you resolve the registration or activation errors occurring in QuickBooks Desktop. We’ve tried to provide you with a complete guide on how to resolve such errors. We hope you can successfully learn how to register QuickBooks Desktop. However, even after this, if you face issues, you are welcome to connect with us. Our skilled team of executives can help you with your issues and can provide you with the required assistance. Do chat with us or shoot us a mail at info@quickbooksorg.com. We’d be happy to help!
Frequently Asked Questions
Q1. What issues can occur during the registration or activation of the QuickBooks Desktop?
Ans. The following issues can trigger when you are trying to register or activate QuickBooks Desktop-:
1.) If the information you are entering in QuickBooks is rejected, then you should check whether the information you are supplying is correct or not.
2.) If you get a blank screen, you should get the antivirus disabled temporarily.
Q2. What can cause validation errors in QuickBooks?
Ans. A number of reasons can cause validation errors in QuickBooks. They are as follows-:
1.) License number, validation code, or product code is wrong
2.) EntitlementDataStore.ecml file is damaged or corrupt
3.) Windows operating system is not working well
4.) Privacy settings of the Microsoft.Net framework are too long
Q3. Is there a need to mention the license number or product number when you activate QuickBooks Desktop?
Ans. Yes, you need to mention the license number and product number during the registration process. You can access your license number and product number from the confirmation mail at the time of online purchase. You can also go to the Customer Account Management Portal to get your license and product numbers. If you purchased it from a shop, look for the bright color tag on the CD.
Q4.) Do you need a password if you need to register QuickBooks Desktop?
Ans. Should you need a password, you can reset it by following these steps. Go to the Company file. On the company page, you’ll get Setup Users and Passwords menu. From there, choose Users and Passwords. Reset the password in the password option. Once done, click the OK button.